
Coaching Patients (A Slideshow Guide) Coaching patients improves insertion by 95%! This slide show provides guidance for you about how to use our FREE EduCare kits (contact us to order anytime) and coach your patient. Scroll through the steps using the left and right arrows. If you are concerned with coaching patients, or need more detailed information, contact us about […]
9. Advise
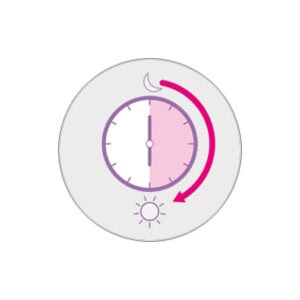
9. Advise About Timing Caya must be left in place for 6 hours after having sex before removing. […]
9.1 Dispose
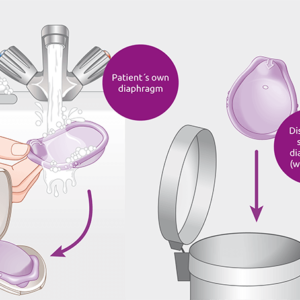
10. Advise on Caya Care If you have been using the patient’s Caya® diaphragm, have her clean it under running water with a mild soap, dry and put back in its case. The woman (patient) should be encouraged to contact her healthcare provider if she has any questions or concerns about using the Caya® diaphragm, or she might return to […]
8.1
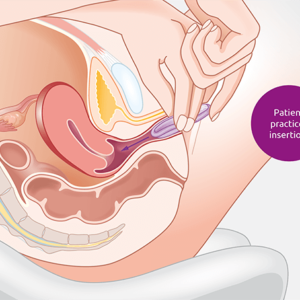
The woman should practice handling, inserting and checking correct placement of the Caya on her own. Then practice removal. The provider should encourage the woman to use what ever insertion position is most comfortable and easy for her. The woman should walk around for a few moments after inserting the Caya (the Caya will settle more firmly into position as […]
8. Removal
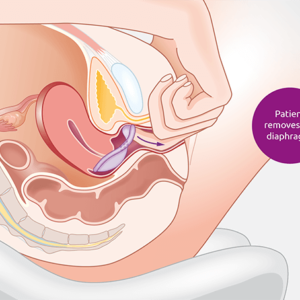
8. Patient Removes Caya The woman should feel for the removal dome at the front end of the Caya® diaphragm. Using her finger she will hook the diaphragm rim through the removal dome. Then she pulls down and out to remove the diaphragm. If she has difficulty removing the diaphragm, encourage her to try a different position (e.g., squatting or […]
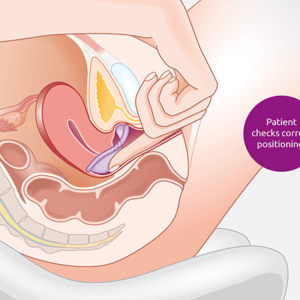
7. Patient
7. Patient Checks Placement Have the client check fit and placement of the Caya. The woman should walk around for a few moments after inserting the Caya (the Caya will settle more firmly into position as the woman moves). Before the woman leaves the clinic, you should be comfortable that the woman can insert, check position and remove the diaphragm […]
6.1
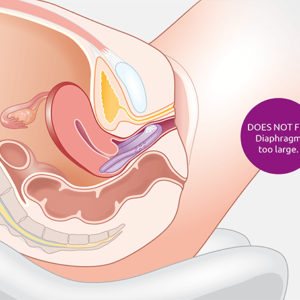
Too large? If the Caya® diaphragm is too large, it will not be able to be inserted comfortably. The woman will feel the anterior edge of the diaphragm at the introitus. The fit will not be secure and it could slip out. Ask the woman to stand up and move around to get the Caya® situated. If the woman experiences […]
6. Check
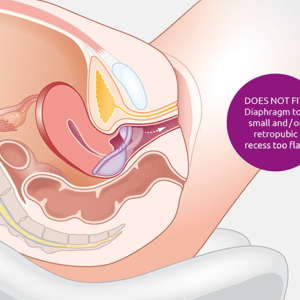
6. Check for the right fit. Paragraph: The Caya® diaphragm should lie diagonally between the posterior fornix and the pubic notch (or recess). Too small? If the diaphragm is too small, the membrane of the diaphragm may not cover the cervix even after the Caya is fully inserted. If the pubic notch is too flat or shallow, the anterior edge […]
5. Push
5. Push You will need to shift your hand position as the diaphragm is inserted, so eventually your finger will push on the anterior edge of the Caya® as you push it into place. The cervical cup should be covering the cervix. […]

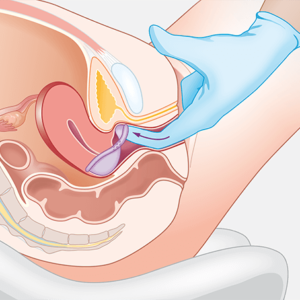
4 Insert
4. Insert With one hand holding the Caya® in the folded position, open the labia with the other hand. While keeping the Caya® folded, insert the diaphragm as deeply as possible. Push down so the diaphragm slides along the posterior vaginal wall toward the tail bone. […]